
Breaking News
Quick Startup

Quick Startup gives the instruments to accelerating a PC by singling out moderate moving startup programs. With a fundamental setup and noteworthy results, this system will surely have any kind of effect.
We were satisfied to find the system's interface was unimaginably easy to work, lodging its few charges on a solitary, instinctive screen. This was a gift, as the Help document's instructional exercises were brief and not extremely valuable. Quick Startup recorded each project that begins running when we turned our PC on. With every, we were given a basic a single tick choice for deferring it. The projects were given a straightforward rating taking into account how moderate they moved and this was our aide for postponing them. Once restarted, we saw an expansion in velocity and that the slow projects held up a couple of minutes after startup to start. The system gave a supportive component that dealt with all our booked assignments, for example, upgrades and infection examines. We could alter this and apparently increment speed guaranteeing no two kept running in the meantime. Generally speaking, the system was sufficiently straightforward for beginners to see, yet gave comes about that all level of user could appreciate.
Quick Startup is a freeware program. With straightforward controls and quick results, we profoundly prescribe this program.
HP USB Disk Storage Format
HP USB Disk Storage Format Tool is a Windows-based organization utility. It can design any USB Flash drive in FAT, FAT32, or NTFS record frameworks and makes DOS startup plates that can boot a PC.
HP USB Disk Storage Format Tool is convenient freeware, so you can convey it on a USB drive and configuration other Flash drives on any Windows PC, or even duplicate it to a PC, run it, and after that simply erase it.
Generally, HP USB Disk Storage Format Tool utility will arrange any USB flash drive, with your decision of FAT, FAT32, or NTFS segment sorts. You can likewise make the plate bootable by determining a document area. The drawback is that you may need to run the tool as admin.
Download:

Internet Tricks

A) Remove the Reserved Bandwidth for System:
Bandwidth is the amount of data that you are allowed to download/upload at any given time. I am not going to discuss the technical part but just for the general concept one should note that in a computer system there is a QoS (Quality of Service) Packet Scheduler which controls the percentage of connection bandwidth that the system can reserve.
Internet Service Providers (ISPs) promise to provide you a certain speed, but sometimes you do not receive that speed on your device, there are lot of reasons which may cause slow internet speed and one of those reasons bandwidth reservation is most common.
By default, your computer system may reserve up to 20 percent of the network bandwidth for QoS traffic handled by the QoS Packet Scheduler to improve the performance of Enterprise Resource Planning (ERP) applications, video conferencing and Internet Protocol (IP) telephony and windows updates etc.
Therefore, you may follow the following steps to set the bandwidth limit to 0 (zero) for speed up your browsing and downloading files:
Step-1:
Press the Windows logo key ⊞ Win + R to open the Run command window.
Step-2:
Now, type gpedit.msc and press Enter or click on OK button to open the local group policy editor window.
Step-3:
On the left side column under computer configuration select/ click on Administrative templates and on the right side column double click on Network > QoS Packet Scheduler > Limit reservable bandwidth.
Step-4:
In the open window, select Enable and reduce the bandwidth limits percentage to 0 (zero) and apply it.
B) Turned off Updates:
Yes, it’s true. There may be some applications running in the background for the latest updates even after closing your web browsers. Thus, you should turned off the update options from all your applications and softwares including windows updates. You may set the update option for manual update and update them once in a sennight.
C) To accelerate internet, speed up your Computer:
To run fast, you must be healthy/ energetic and accordingly, to gear up your internet connection speed your Personal Computer (PC) and Laptops shall also be very fast and clean from any malicious softwares. Therefore, remove all unnecessary softwares which are not usable at all.
Did you know? Whenever, you download any data into your computer, install and uninstall any programme on your PC, it results various registry fragments, lots of bereaved startup tasks, temp folder and files and various unused processes or services etc.
Accordingly, if you will not check and remove those unnecessary stuffs as mentioned above, it harms your computer system and resulting slow down PC and crash more frequently.
D) Clear Browsing Data:
Sometimes, your internet connection will boost after cleaning all browsing data from internet browsers. To clear/delete the browsing data viz. browsing history, download history, cookies and other site and plug-in data, empty the cache, saved passwords, saved Auto-fill form data, data from hosted apps and de-authorise content licenses etc. press Ctrl + Shift + Delete
E) Contact Internet Service Provider (ISP):
This is very simple but effective as because if you are not getting the internet speed you are paying for then contact your Internet Service Provider (ISP) to find out how much speed you should be getting. Change your plan to the next level and enjoy.
MS Paint Tricks
Here are a couple of Paint features and tips that might just help you take a second look at this old performer.
Tip #1 – Increase or Decrease brush size
These are universal shortcuts: CTRL + NumPad (+) increases the size of tip while CTRL + NumPad (-) decreases the size. This shortcut works for the pencil, brush, airbrush and the line drawing tool.
Tip #2 – Changing the Image Size
The above shortcuts (CTRL + & CTRL -) can also be used to resize image selections in Paint without having to drag the selection. Simply use the Selecttool in Paint to select an area of the image and then use the CTRL shortcuts to change the size of the selection.
Tip #3 – Use the Eraser as a Color Replacement Tool
Say you have an uneven patch of yellow color on an image that you now want to replace with blue. You could use the Fill bucket command to fill that patch with Blue but since the shape is not uniform, lets use the Eraser tool to only replace the color that we want.
First use the colour picker tool to pick the (foreground) colour that you want to replace (in this case, left-click anywhere that has yellow). Now choose the replacement (background) colour by right-clicking in the color palette. Next, select the eraser tool and wave it across the image while you hold the right-click button.
Tip # 4 – Undo the Last Operation with your Mouse
MS Paint supports 3-level of undos meaning that you can only undo the last 3 changes made to a drawing. You can however undo (or rather cancel) the last operation using the right button of your button.
For instance, if you have selected the freehand tool to draw a line but if the line doesn’t meet your expectation, don’t let go the left button and click the right-button to cancel the last operation. This will save you from using the keystroke CTRL+Z to undo your last stroke and won’t add anything to your undo stack.
Tip #5 – Use the colour palette to store 3 shades
If you left click on a colour shade, it becomes the primary colour while right-clicking on another colour will make that a secondary colour. There’s however an option to store a third colour in the palette as well.
Just select the “Pick Color” tool and CTRL+ left-click on any one of the shades in the Palette or the canvas window and then CTRL+ left-click to use this new 3rd shade without losing the 2 earlier shades. You can then access this color by holding the Ctrl key while drawing.
Explorer Tricks

The File Explorer changed its name in Windows 8 (it was previously known as the Windows Explorer), but it's gotten more functionality in Windows 10. Because the File Explorer is where you'll go to find, manage, and otherwise explore your files, you may as well make it as comfortable an experience as you can. Here are some tips -- including handy keyboard shortcuts -- you can use to make the new File Explorer work for you.
Use keyboard shortcuts
Keyboard shortcuts make everything better! By far the handiest keyboard shortcut is Windows key + E, which will open a new File Explorer window (if you've ever tried to move or copy files between two folders, you know why this shortcut is a lifesaver).
Here are a few useful keyboard shortcuts you can use inside File Explorer:
Ctrl + N: Open a new File Explorer window with the same folder.
Alt + Up: Go up one folder level.
Alt + Right/Left:Go forward/back.
Alt + Enter: Open the Properties window of a selected file or folder.
Ctrl + Shift + N: Create a new folder.
Alt + P: Show/hide the Preview pane.
Alt + Shift + P: Show/hide the Details pane.
Customize the Quick Access list
The Quick Access list is exactly what it sounds like -- a quickly accessible left-pane list of your favorite and most recently-used folders. There are three ways to pin a folder to the Quick Access list: Drag the folder from the right pane into the list; select the folder and click the Pin to Quick access button in the ribbon; or right-click the folder and choose Pin to Quick access from the dropdown menu.
You can also customize how File Explorer feels by right-clicking the Quick Access list and clickingOptions. Here you can choose how File Explorer acts -- whether folders open in the same window or in new windows, whether folders are opened with single- or double-clicks, etc.
Customize the Quick Access toolbar
The Quick Access toolbar appears by default in File Explorer's title bar. This toolbar holds convenient one-click buttons that let you perform actions like creating a new folder or opening the properties window. You can customize the Quick Access toolbar by clicking the downward facing arrow and ticking (or unticking) the following actions: Undo, Redo, Delete, Properties, New window and Rename. From this menu, you can also choose to have the Quick Access toolbar appear above or below the ribbon.
But there's more! You're not limited to the actions on the Quick Access toolbar customization menu -- you can right-click any action in the ribbon (e.g., Burn to disc or Select all) and click Add to Quick Access Toolbar and that action will appear in the Quick Access toolbar.
Hide the ribbon
If you set up the Quick Access toolbar properly, you may not need the space-consuming ribbon to be ever present. To hide the ribbon, click the downward facing arrow on the Quick Access toolbar and tickMinimize the Ribbon.
Change how File Explorer opens
By default, File Explorer opens to the Quick Access list. But you can change this so that File Explorer opens to This PC (basically My Computer). To do this, open File Explorer and go to View > Options. Next to Open File Explorer to:, choose This PC instead of Quick access and click OK to close the window and apply your changes.
Quickly rotate pictures
You can quickly rotate photos or set them as your background image directly from File Explorer's Picture Tools menu. The Picture Tools menu will appear, highlighted in yellow, in the title bar of your File Explorer window when you open a folder containing picture files. Click on the Picture Tools menu and you'll be able to rotate photos, view the photos in the folder as a slideshow or set a selected photo as your PC's wallpaper.
Task Manager Tricks
1. Launch the Task Manager
As of now, there are five different ways to launch the Task Manager. Some are well known and commonly used, but a few are less obvious, easier to use, and arguably better for the average user. Pick the one you prefer and use it to your heart’s content.
1. Ctrl + Alt + Del. Here’s the method that nearly everyone knows about. There’s nothing wrong with it, but in Windows 10, it doesn’t directly launch the Task Manager. Instead, it presents you with a choice and you have to click the Task Manager option to launch it. Yuck.
2. Ctrl + Shift + Esc. This keyboard shortcut immediately launches the Task Manager, no option selection necessary. What’s nice is that you can execute it with one hand (unlike Ctrl + Alt + Del, which requires two hands for most people). Personally, this is the method I prefer to use.
3. The Taskbar. If you right-click on the Taskbar at the bottom of the screen, there’s an option you’ve probably missed time and time again: Task Manager! This is the easiest method to use if your hands are off the keyboard.
4. The Power User Menu. A lot of people don’t realize how useful the Power User Menu can be. You can access the menu with the Win + X keyboard shortcut or by right-clicking on the Start button. Either way, just select the Task Manager option. This is another great way to launch the Task Manager with nothing but the mouse.
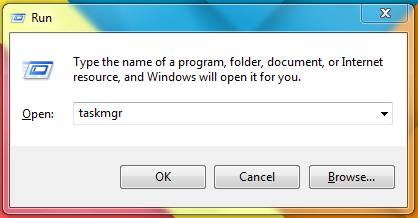
5. The Run Command. Open the Run prompt with the Win + R keyboard shortcut, then typetaskmgr and hit Enter. You can also run this command in the File Explorer address bar or in the Start Menu search bar.
2. Find Out Why Apps Are Frozen
As we mentioned before, the most common reason to open the Task Manager is to kill a frozen application. But the next time you’re in that situation, don’t be so quick to pull the trigger — it’s possible that the program isn’t frozen, just taking a while to process a task.
Prematurely killing an active application could result in lost data, and even if you’re diligent about keeping good backups, you may not be able to recover everything. That’s why, whenever possible, you should wait and see if a frozen application resolves itself.
That’s when the Analyze Wait Chain feature in the Task Manager comes in handy. It can tell you when a process is stuck waiting on another process, which can help you identify why an application isn’t responding (i.e. which process is the real culprit). Only available under the Details tab.
3. Restart Windows Explorer
Sometimes you may find that some parts of your system aren’t responding (e.g. Taskbar, File Explorer, Start Menu, etc.) while other applications are running just fine. Restarting your computer will solve the issue, but it may be enough to restart Windows Explorer instead.
This is actually a common enough problem that Task Manager now has a special action for the Windows Explorer process: Restart. This will kill the task for you and automatically restart it. (It conveniently saves you from having to restart it yourself.) Always worth a try when Windows is frozen but other applications aren’t.
4. Monitor Performance & Resources
Here’s where the Task Manager really shines. Not only does it provide an overview of all running processes and applications, but it has several tools for effectively monitoring the performance of your system and how your resources are being allocated.
Try these under the Performance tab:
- Resource Monitor: Click on Open Resource Monitor at the bottom of the window to launch the Resource Monitor, which is an advanced way to view real-time data about your system: threads used, disk response times, exact breakdowns of RAM used by processes, etc.
- Overview Modes: Right-click anywhere in the left sidebar and select Hide Graphs to hide the graphs and Summary View to display nothing but the sidebar. The other way works too: right-click anywhere in the right panel and select Graph Summary View to display nothing but the current graph.
- Diagnostic Info: With any resource type selected (e.g. CPU, Memory, Disk, etc), you can right-click anywhere and select Copy to load a diagnostic snapshot into your clipboard. Paste it anywhere — like in Notepad, in an email, or in a forum post — as it could help with troubleshooting.
- Network Details: With Network selected, right-click in the right panel and select View Network Details to get a real-time breakdown of things like network utilization, link speed, bytes sent and received, etc.
- Other Useful Details: Each resource type has some interesting details that might come in handy, such as System Uptime under CPU, RAM Slots Used under Memory, and Read/Write Speeds under Disk.
5. Search Online for Suspicious Processes
Every once in a while, you may find some suspicious-looking process names in Task Manager. Most of the time they’ll be legitimate, but you should never assume that a process is benevolent — especially if you’ve never seen or heard of it before.
Windows can help. Just right-click on any process and select the Search Online action. This will launch a search in your browser with the application name and the process name, which will help you to determine whether or not it’s safe or malicious.
The next time you spot a suspicious process running in Windows, this should be the first step you take. If search results tell you that the process could be related to malware, then you should take further steps to scan and remove potential infections on your PC.
6. Add Extra Columns for Details
By default, the new Task Manager only shows five columns when listing processes: Name, CPU, Memory, Disk, and Network. While these are the most important details, you can actually add up to six more columns just by right-clicking the header area.
The additional columns are Type (or process type), Status, Publisher, PID (or process ID), Process Name (usually the executable file), and Command Line (the command and parameters used when the process was launched).
All of them can be useful in the right situation, but I find that the Process Name is particularly useful because it’s easier to spot suspicious applications by their process name than their application name. The Publisher column can also be helpful when something seems suspicious.
Extra columns can also be added under the Startup tab, whether for troubleshooting purposes (like CPU and Disk I/O at Startup) or just to see which startup processes are still running (with the Running Now column).
7. Toggle Between Values & Percentages
When browsing the list of processes, the CPU column can only be shown with percentages, but the other three default columns can have their displays switched between absolute values and percentages.
Percentages are better when you need a sense of how a particular process’s resource usage compares to the total amount of that resource available. It’s nice to know if Opera is using 40 MB of RAM, but it can also be useful to know that that’s only 2% of all the RAM in your system.
To toggle these, just right-click on any process, navigate to the Resource Values submenu, pick the resource type you want to change, and select either Values or Percents.
8. Manage App Windows Easily
Task Manager is far from the best window management tool out there, but it does have a few actions that you might find useful. To access them, you have to click the pulldown arrow next to the one you want to manage. This only works for items listed under the Apps section of the Processes tab.
Once you open the pulldown menu for an item, right-click it and you’ll see five window actions for that application:
- Switch To: Brings focus to the application and minimizes Task Manager to the Taskbar.
- Bring to Front: Brings focus to the application, but doesn’t minimize Task Manager. Doesn’t work if there’s another application that’s “Always on Top”.
- Minimize: Minimizes the application without bringing focus to the application window.
- Maximize: Maximizes the application without bringing focus to the application window.
- End Task: Kills the application completely.
9. Open App File Locations
Do you often find yourself needing to navigate to the installed location of a particular program? Maybe you need to tweak some configuration files, or maybe you want to drop some new theme files for that particular program.
Crawling through File Explorer is one way to do that, but it requires so many clicks and consumes so much time. Rather, if the program is already running, Task Manager can help you get there in record time.
Just right-click on any process and select Open File Location. This will take you directly to the folder that contains the process’s executable file (i.e. the same file that shows up under the Process Name column if you toggled that on). Super fast, super convenient.
This works for Apps, Background Processes, and Windows Processes — pretty much anything that shows up under the Processes tab can be quick-accessed in this way.
10. Launch the Command Prompt Directly
In the Task Manager, you can go to the File menu and select Run New Task to launch the Run prompt. Most people know this, as it was the best way to manually restart a frozen Windows Explorer in previous versions of Windows.
Well, if you hold the Ctrl key at the same time you click on the Run New Task action, it actually launches the Command Prompt instead of the Run prompt. We’re not sure why this is hidden behind a secret Ctrl modifier because it’s actually a pretty neat trick that many aren’t aware of.
To be fair, there are several other ways to launch the Command Prompt, but it’s still good to know that this trick exists. You never know when you might need to use it.
Subscribe to:
Posts (Atom)